Welcome and here is how to start the process and get an admin (who will manage the company information and postings on the site) setup and started.
It is best to open this course in a browser window on desktop machine off to the side to keep it open, so that you can follow along and perform the actions in another window.
IF YOUR ACCOUNT IS ALREADY SETUP FOR YOU,
Go immediately to step 5.
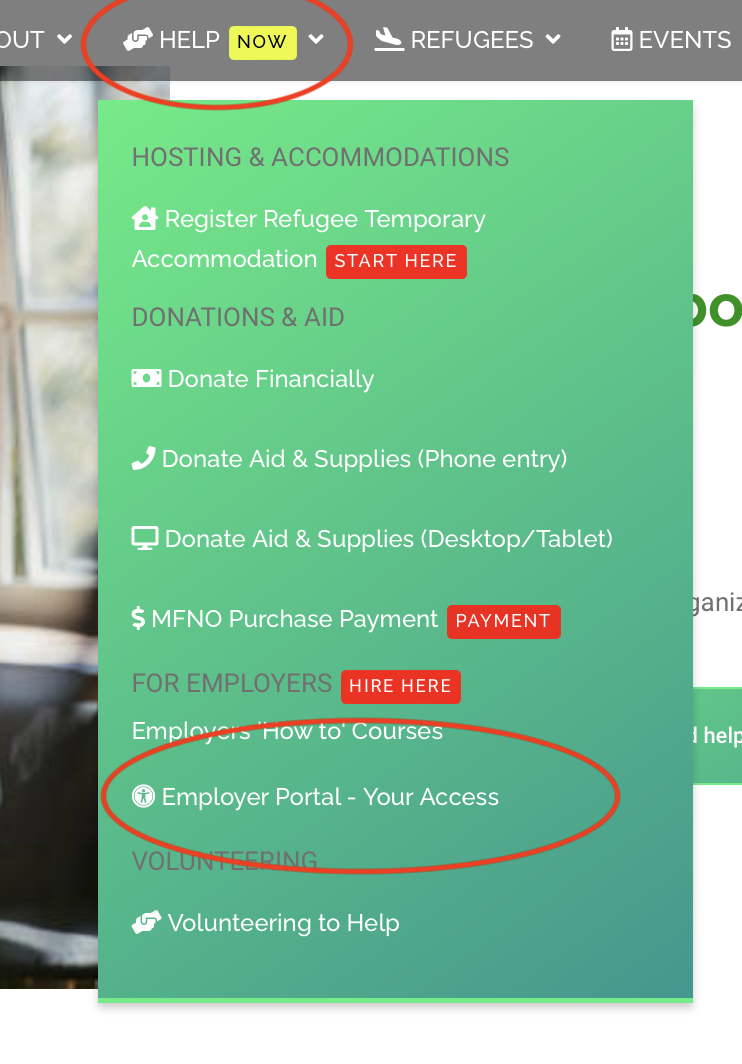
| Step 1. From the HELP menu, select the Employer Portal - Your Access to get started. |
 |
|
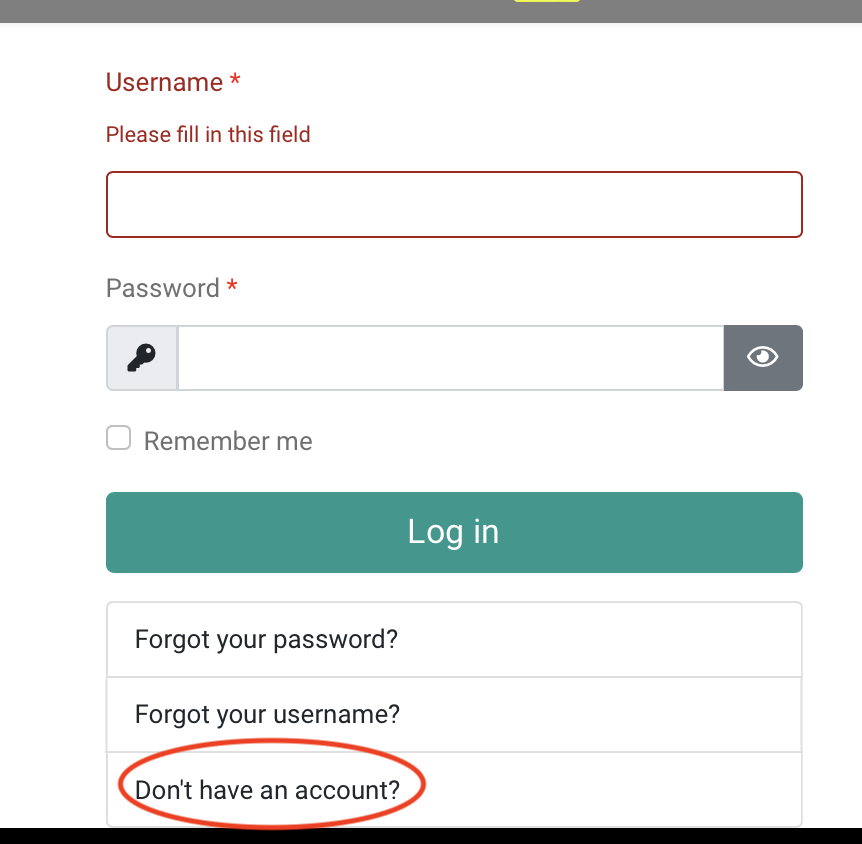
Step 2. You'll be presented with a login screen for your employer portal, and you'll return here to normally login, however we need to create a new account.
Click the Don't have an account option at the bottom to register a new account
|
 |
|
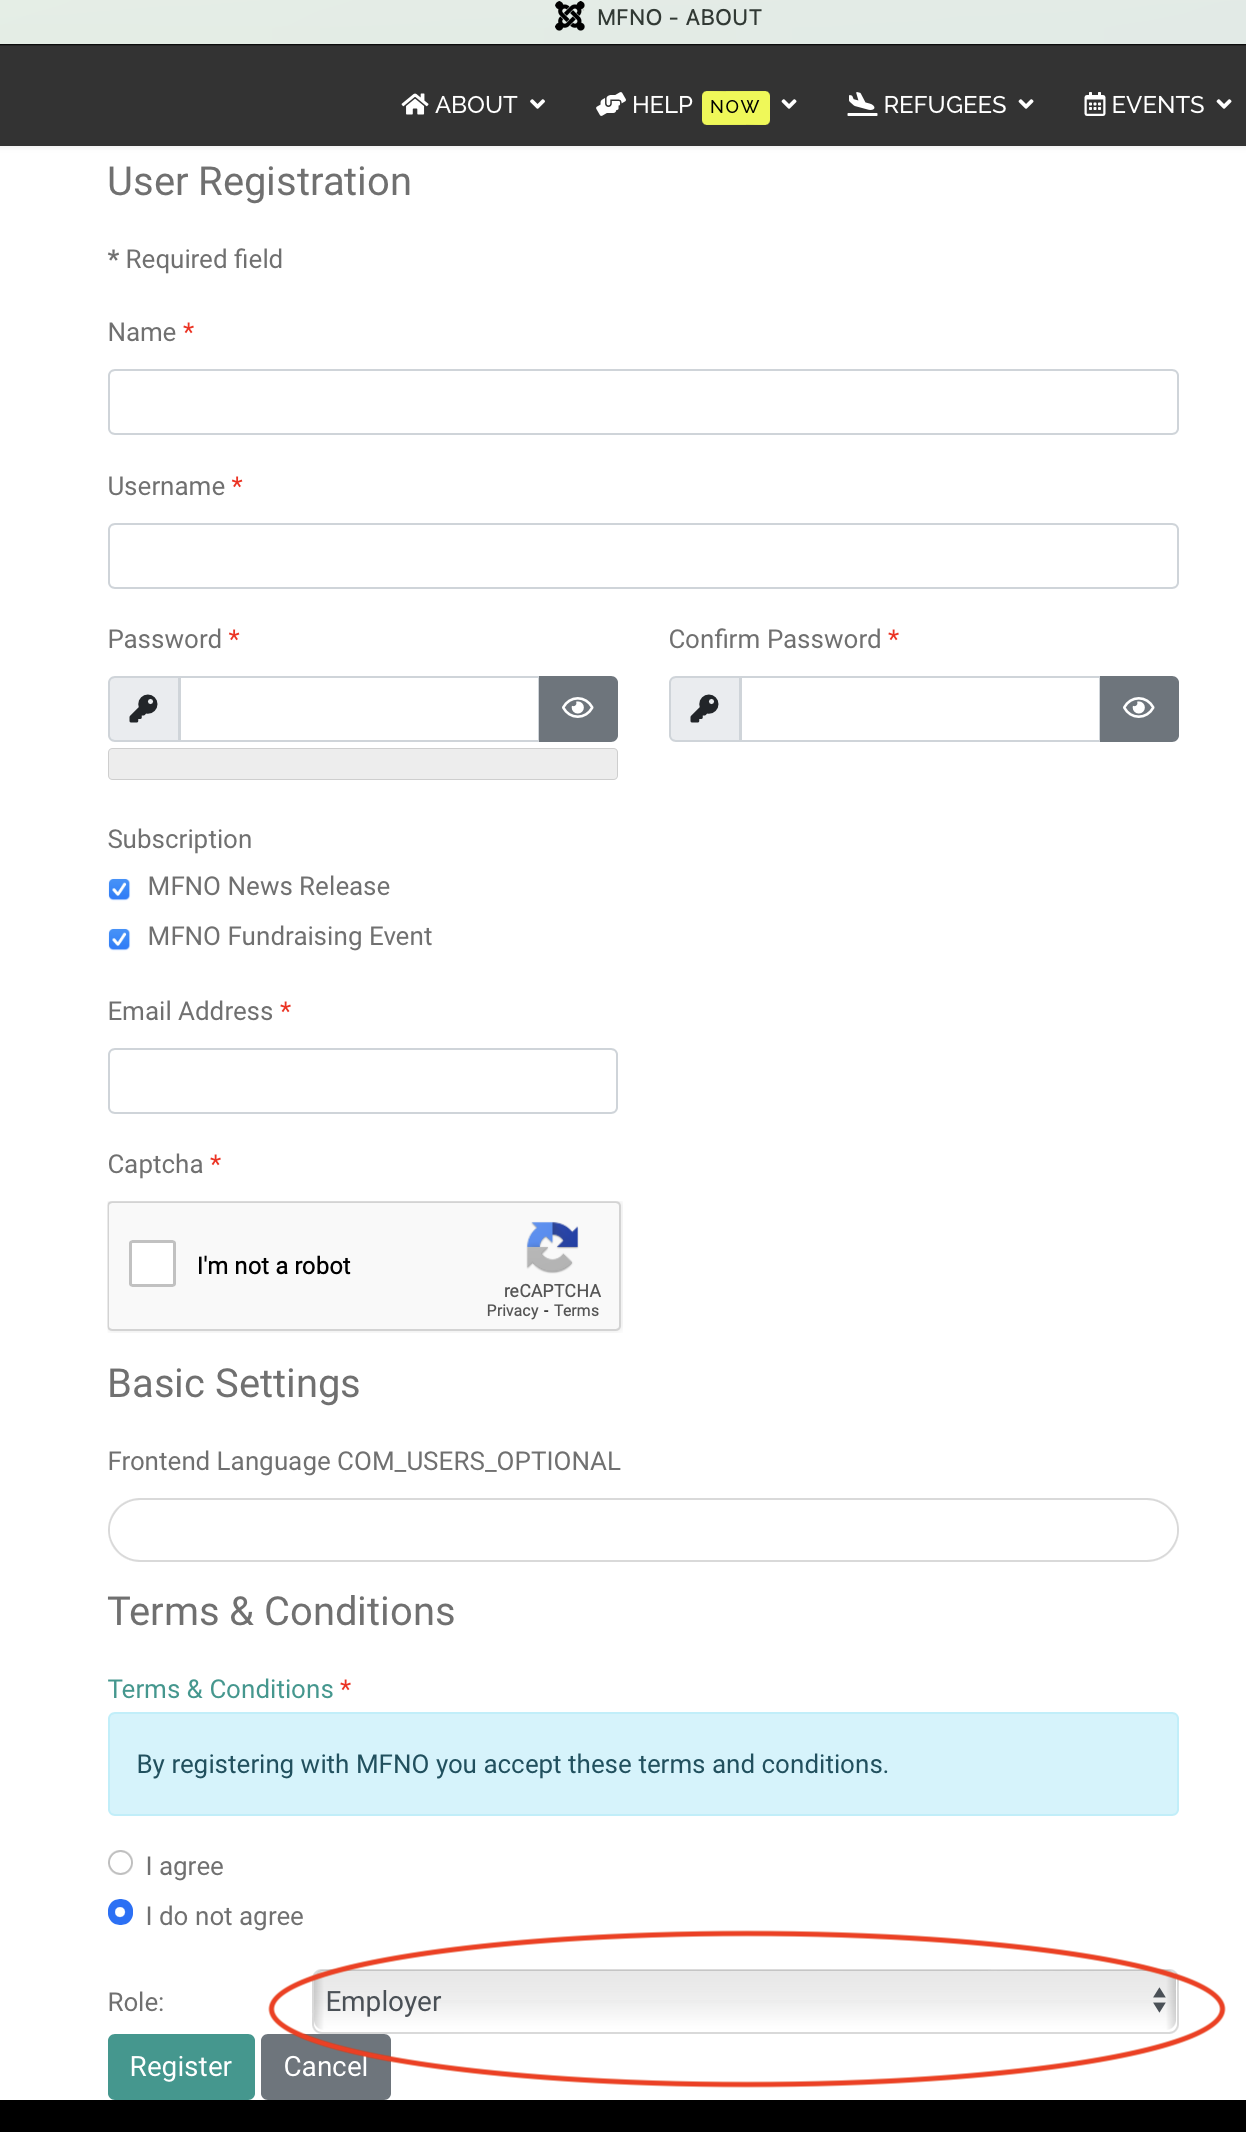
Step 3. Complete all the information on the registration form, being certain to select EMPLOYER in the role field at the bottom.
The email address you enter here can be separate from the company email you may want to register for notices emailing of new applicants, etc. This is simply the user account.
Front end language selection has been disabled as it is handled on the fly by the language translator.
|
 |
|
Step 4. An email will be sent to you to verify your new account registration. Please check your spam account if it doesn't appear in a reasonable amount of time. Shouldn't take more than 10-15 mins.
You will also need to email the admin of MFNO to activate the account you just submitted after you verify your email. You can email This email address is being protected from spambots. You need JavaScript enabled to view it. to request activation. Be sure to include information about who you are and the company you wish to activate (which isn't registered yet), so we can understand who you are. We may contact you to verify further.
|
|
|
Step 5. ONCE ACTIVATED and your admin account is live, you're ready to enter the details about your company.
Return to the Employer Login Portal from step 1 and now log in with your admin account information.
|
|
|
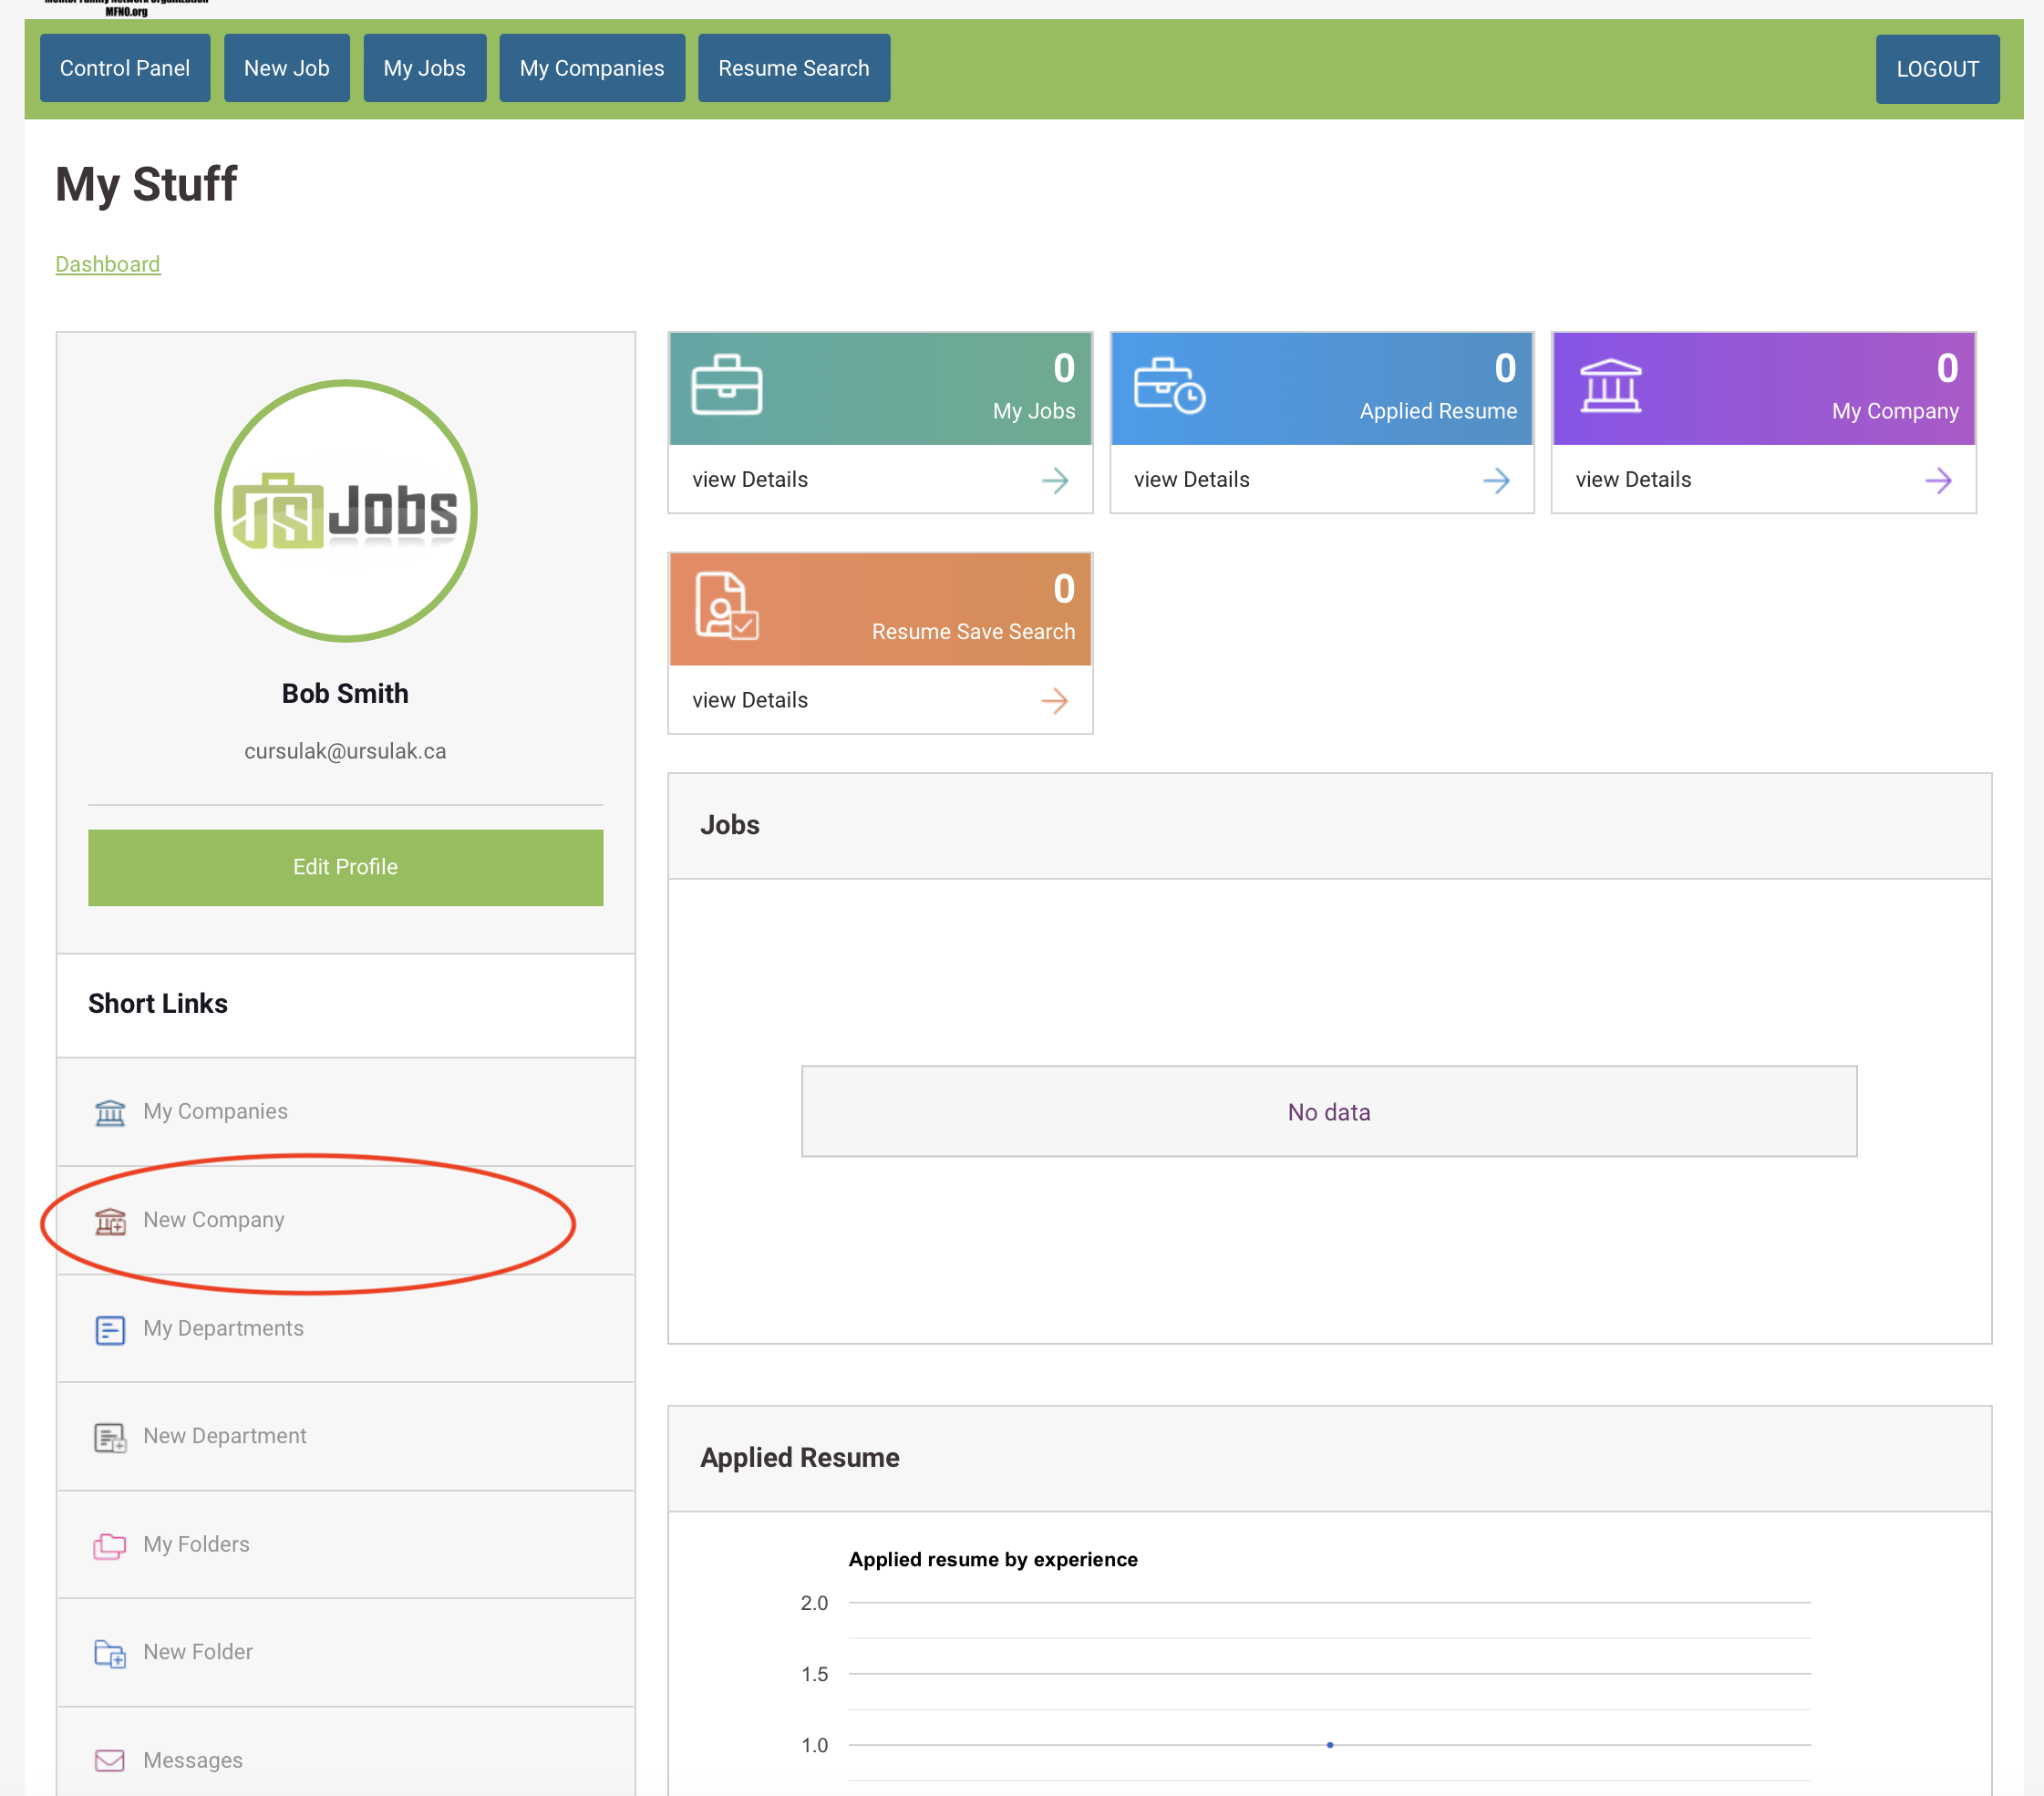
Step 6. ONCE ACTIVATED and your admin account is live, you're ready to enter the details about your company. After logging in your employer dashboard looks like the image to right.
Click on New Company to enter all your company information.
|
 |
|
Step 6. ONCE ACTIVATED and your admin account is live, you're ready to enter the details about your company. After logging in your employer dashboard looks
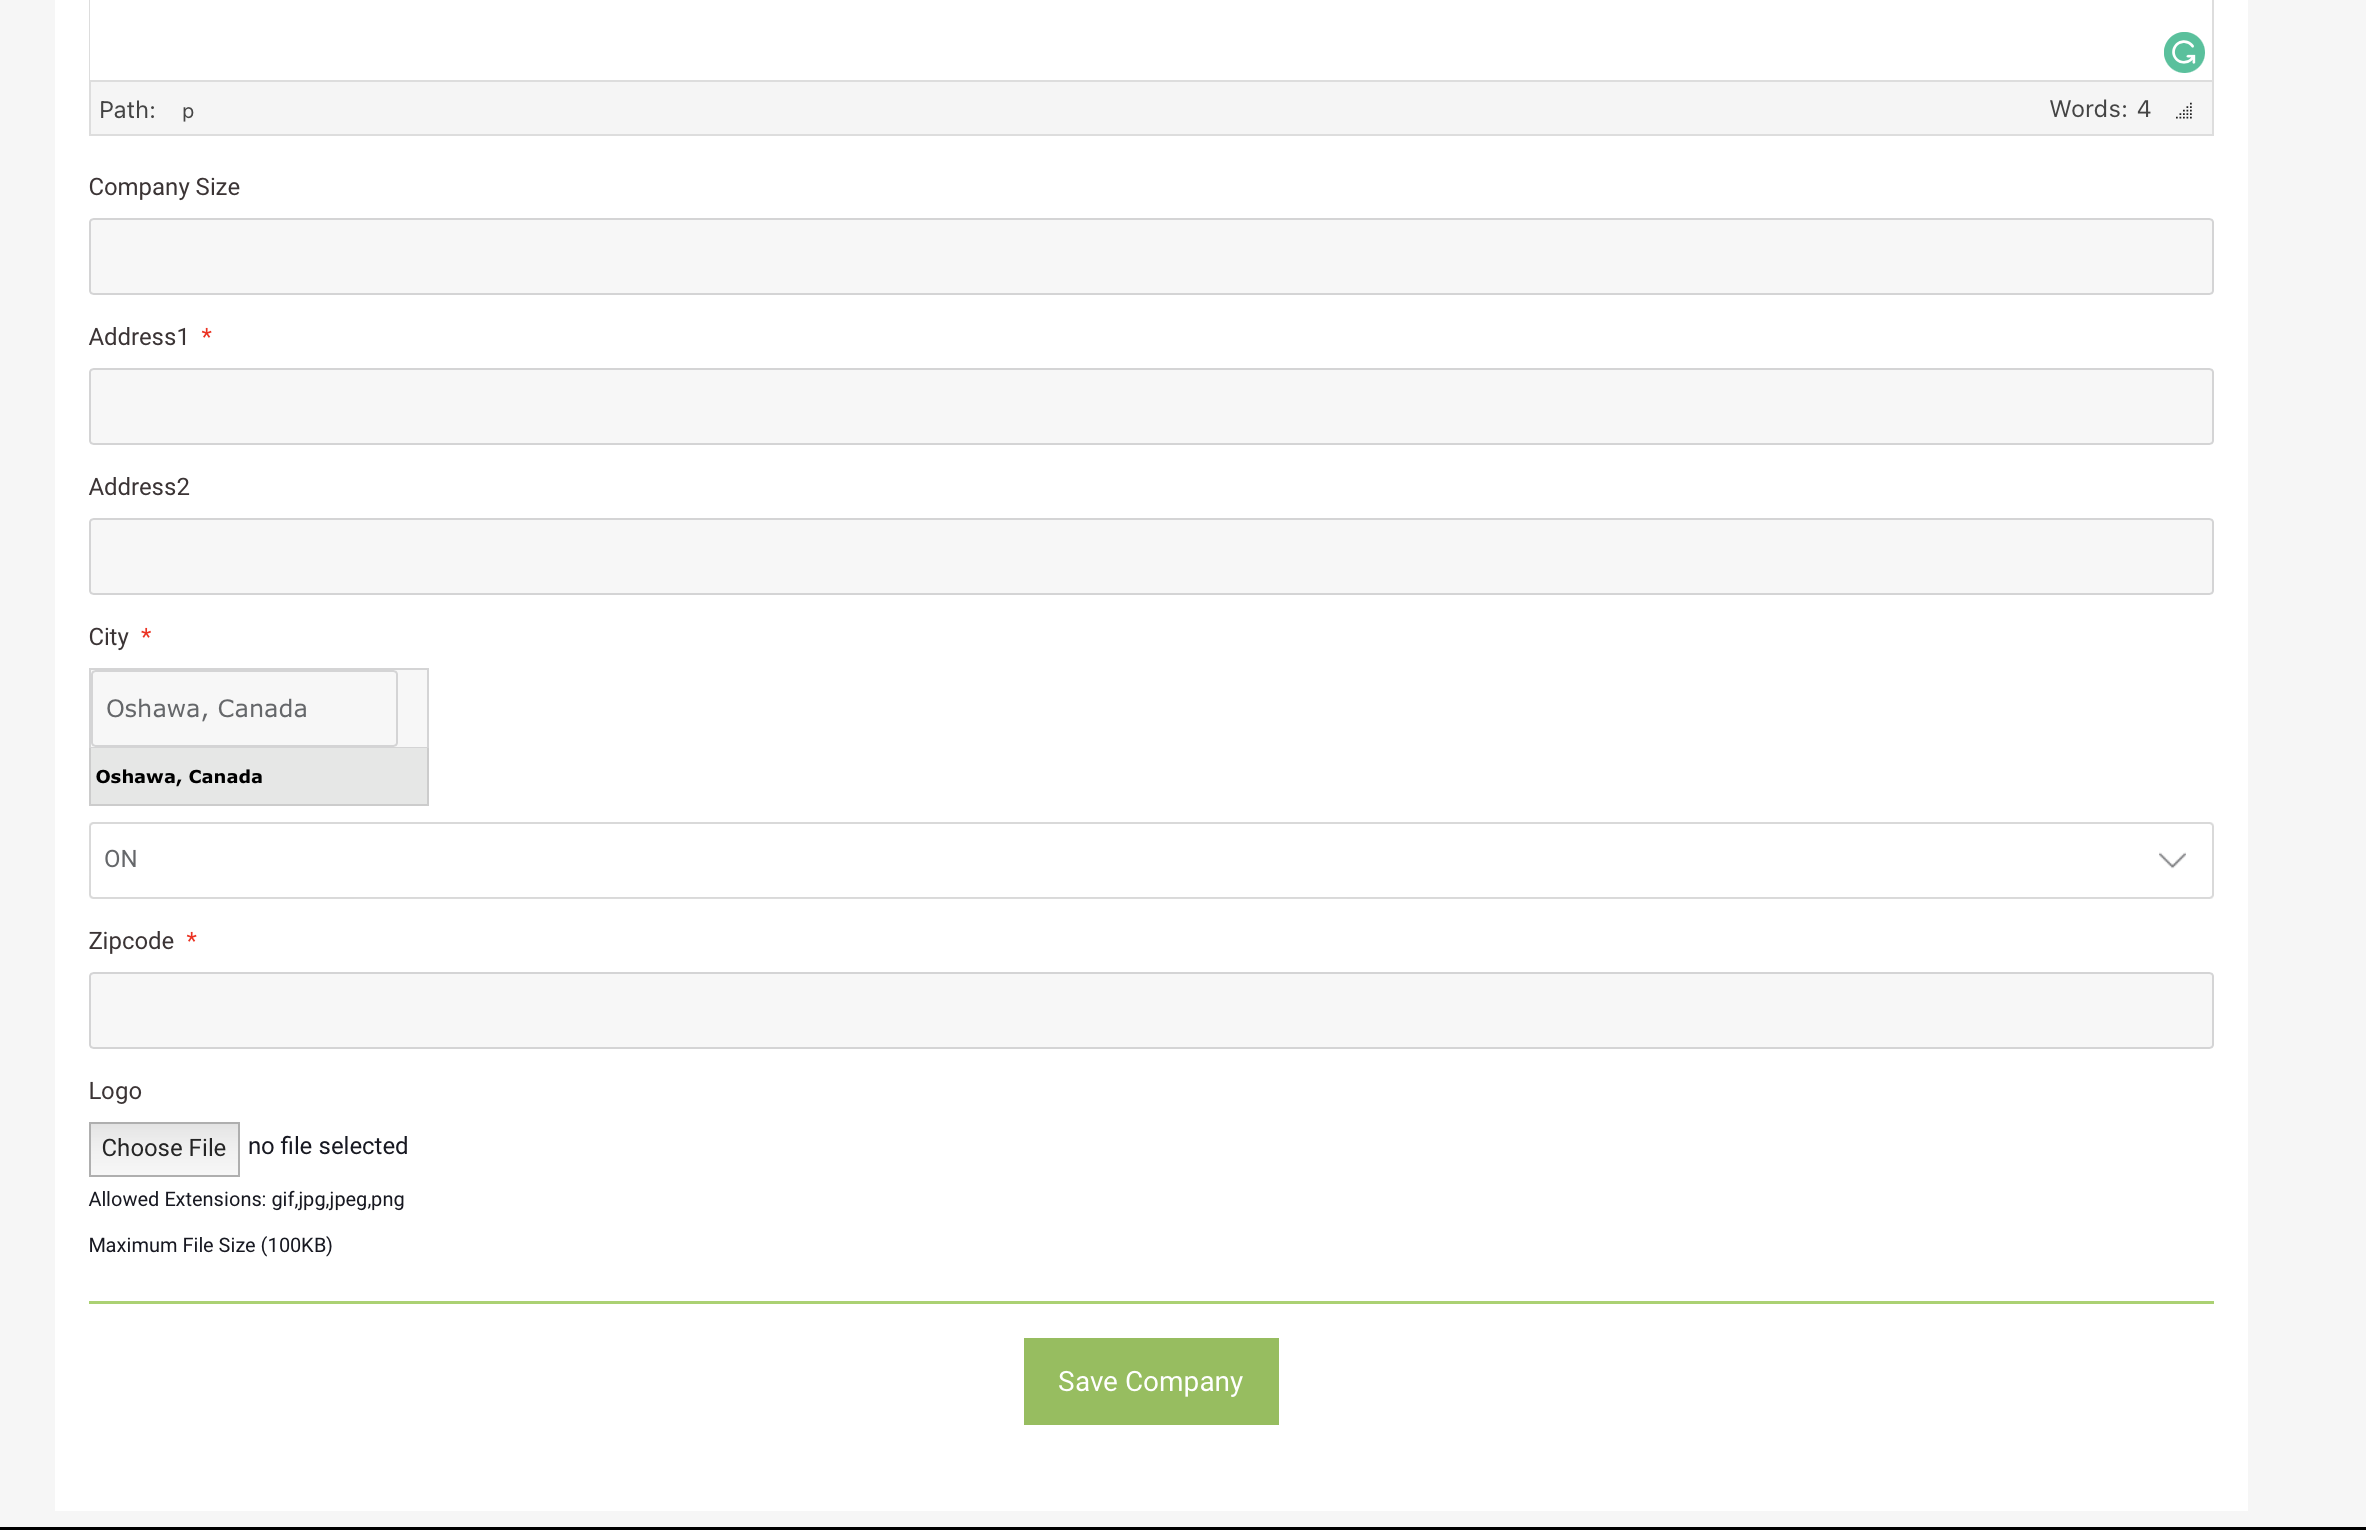
Be sure to complete all fields marketed with an "*"
Also note, the company email can be different than your own if you choose. Some may have a HR or Hiring email they with to put here. This is the email that job seekers and the public will see.
Please complete the full company address.
In Selecting the city you must enter City, Country eg. Toronto, Canada
At this time you may also (and it's recommended) to upload a logo for your company be selecting it at the bottom.
|
 |
|
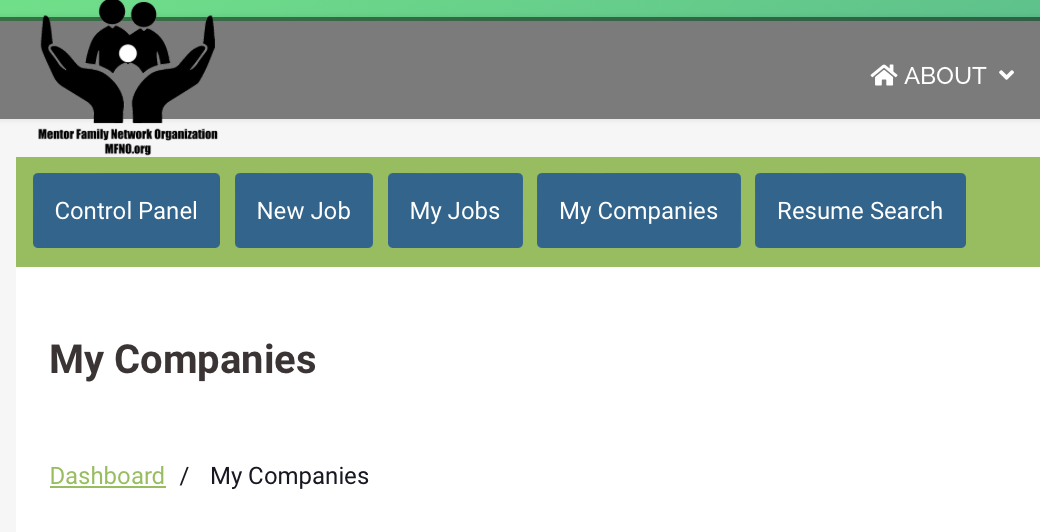
Step 7. Your company has been created and you will be returned to the dashboard where you should see it listed. You can return here anytime to further edit or add details.
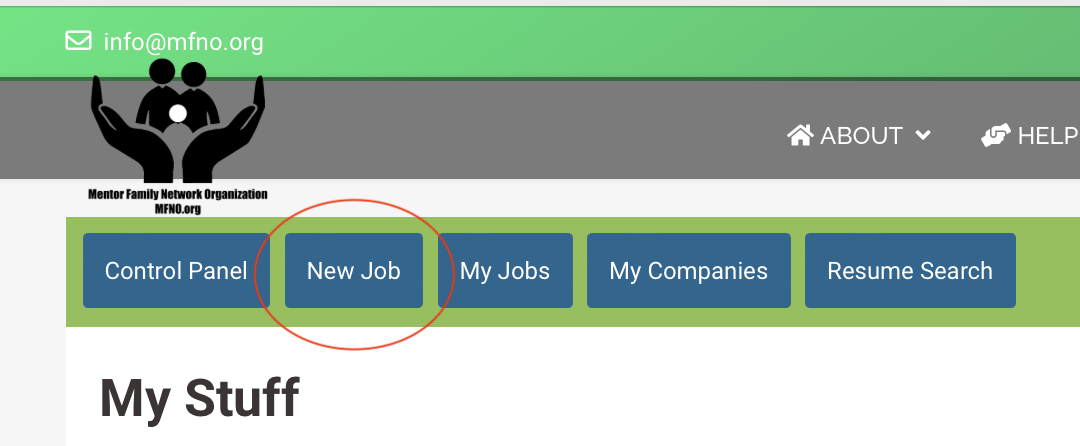
To enter your first employment opportunity, click "New Job" from the top menu to begin entering details about your first posting.
|
  |
|
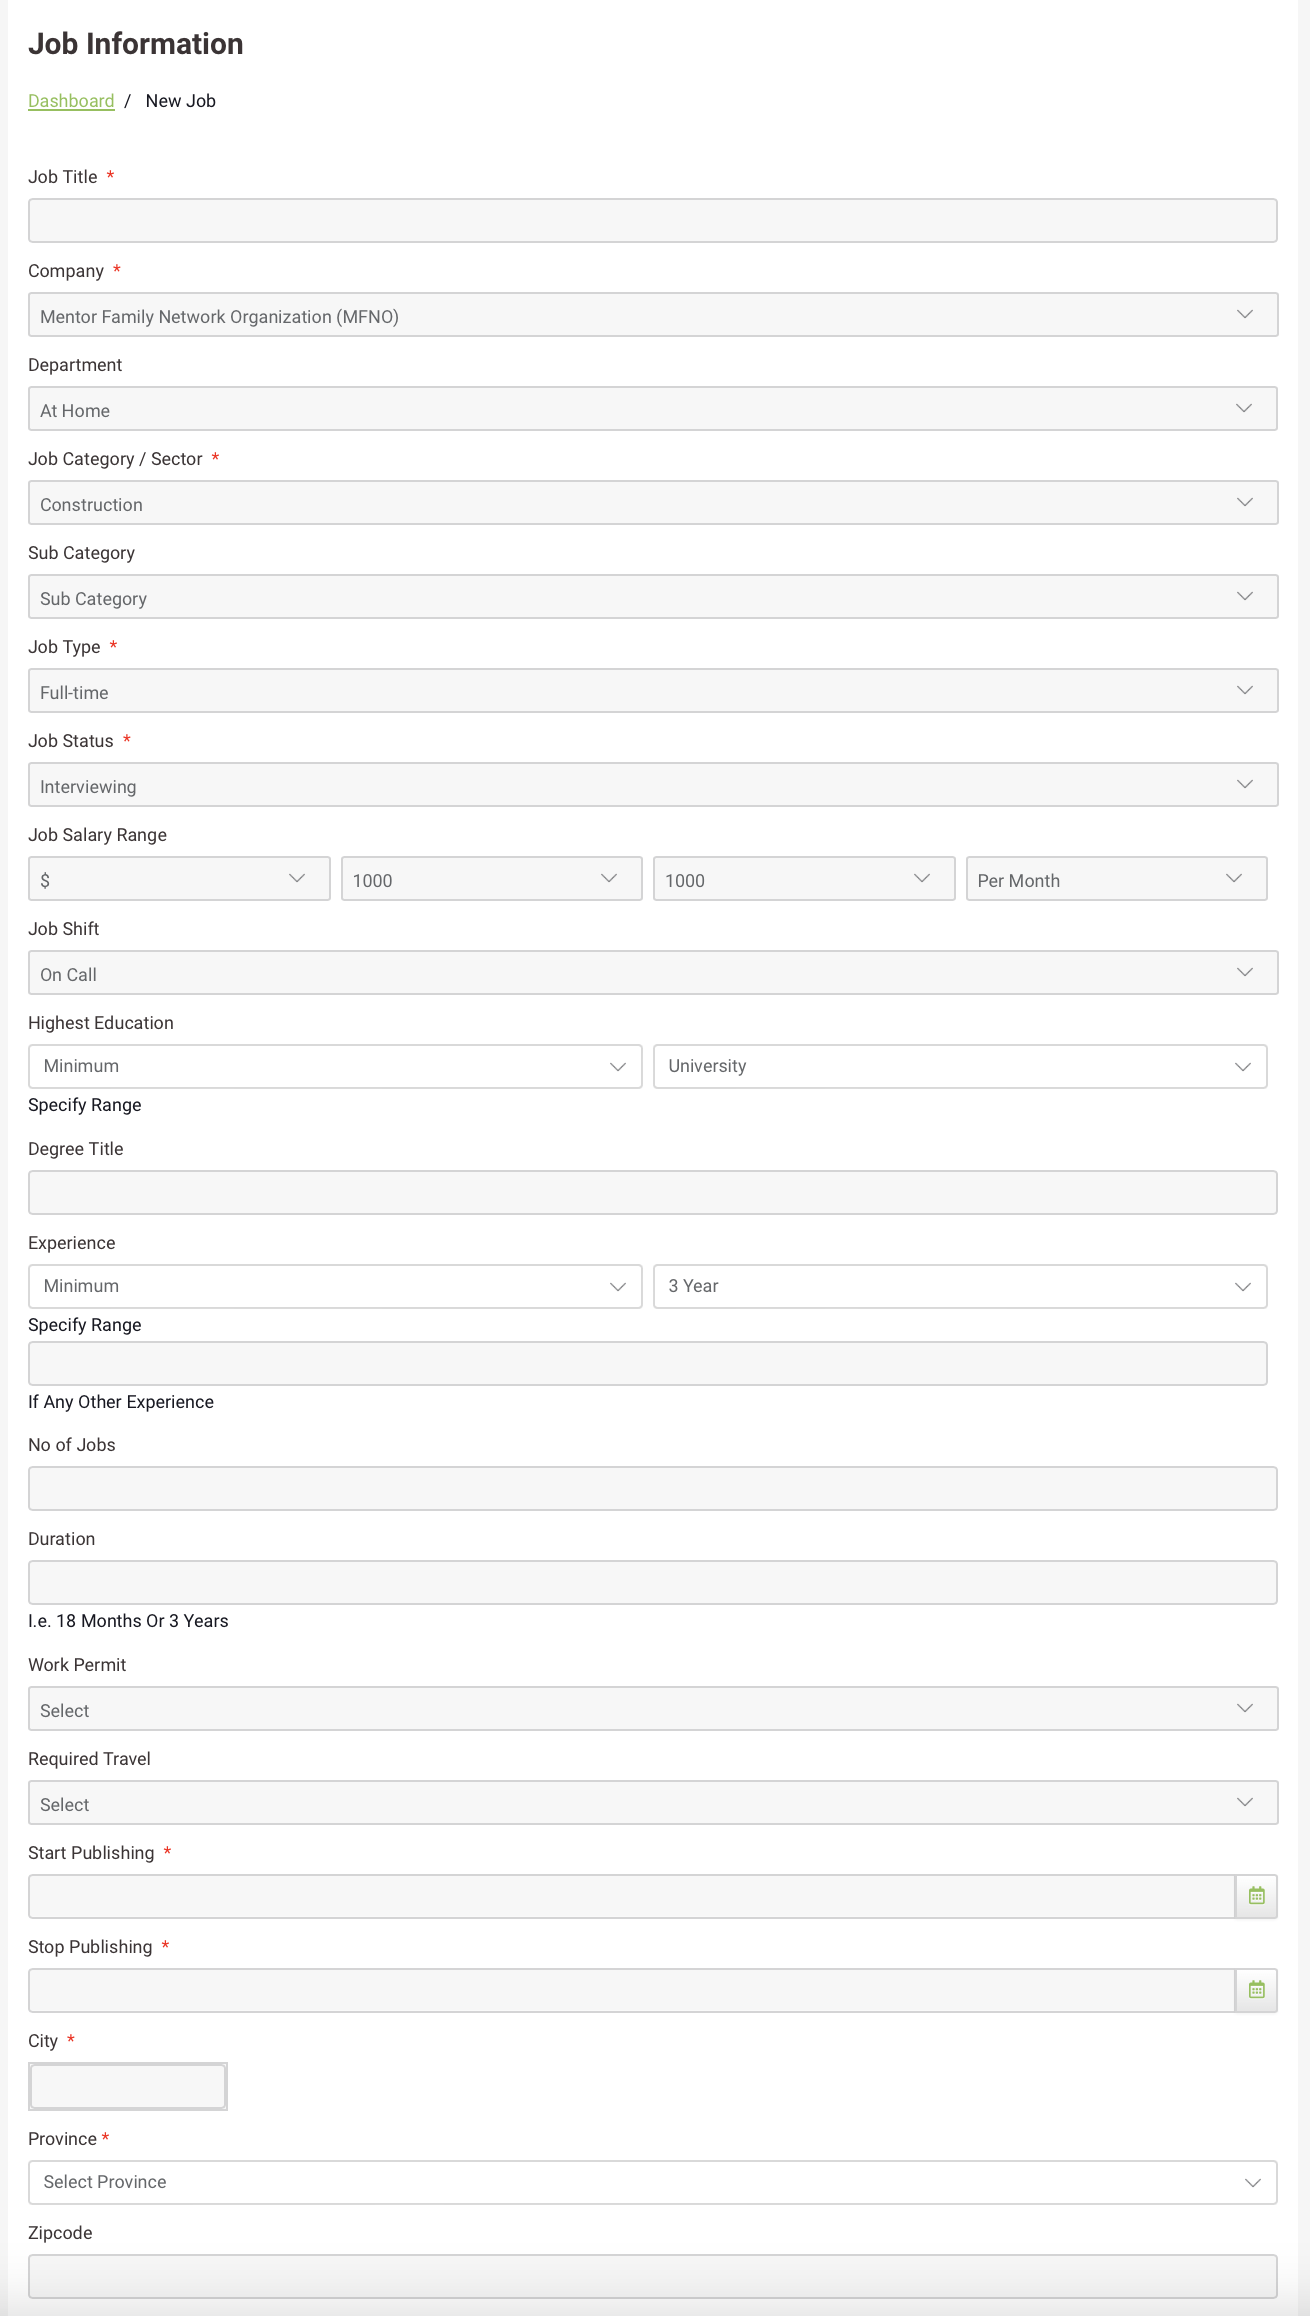
Step 8. Complete all the details of the new offer, being certain to add as much detail as possible. This information helps both the refugees match up their skills to your offering, as well as helps our Mentors understand your offering and help connect you with the best applicants based on location, skills and language.
NOTE: you can post in English, the site will convert the posting to the refugees language on the fly when they are browsing in their language (translation is not perfect, but should get the message across).
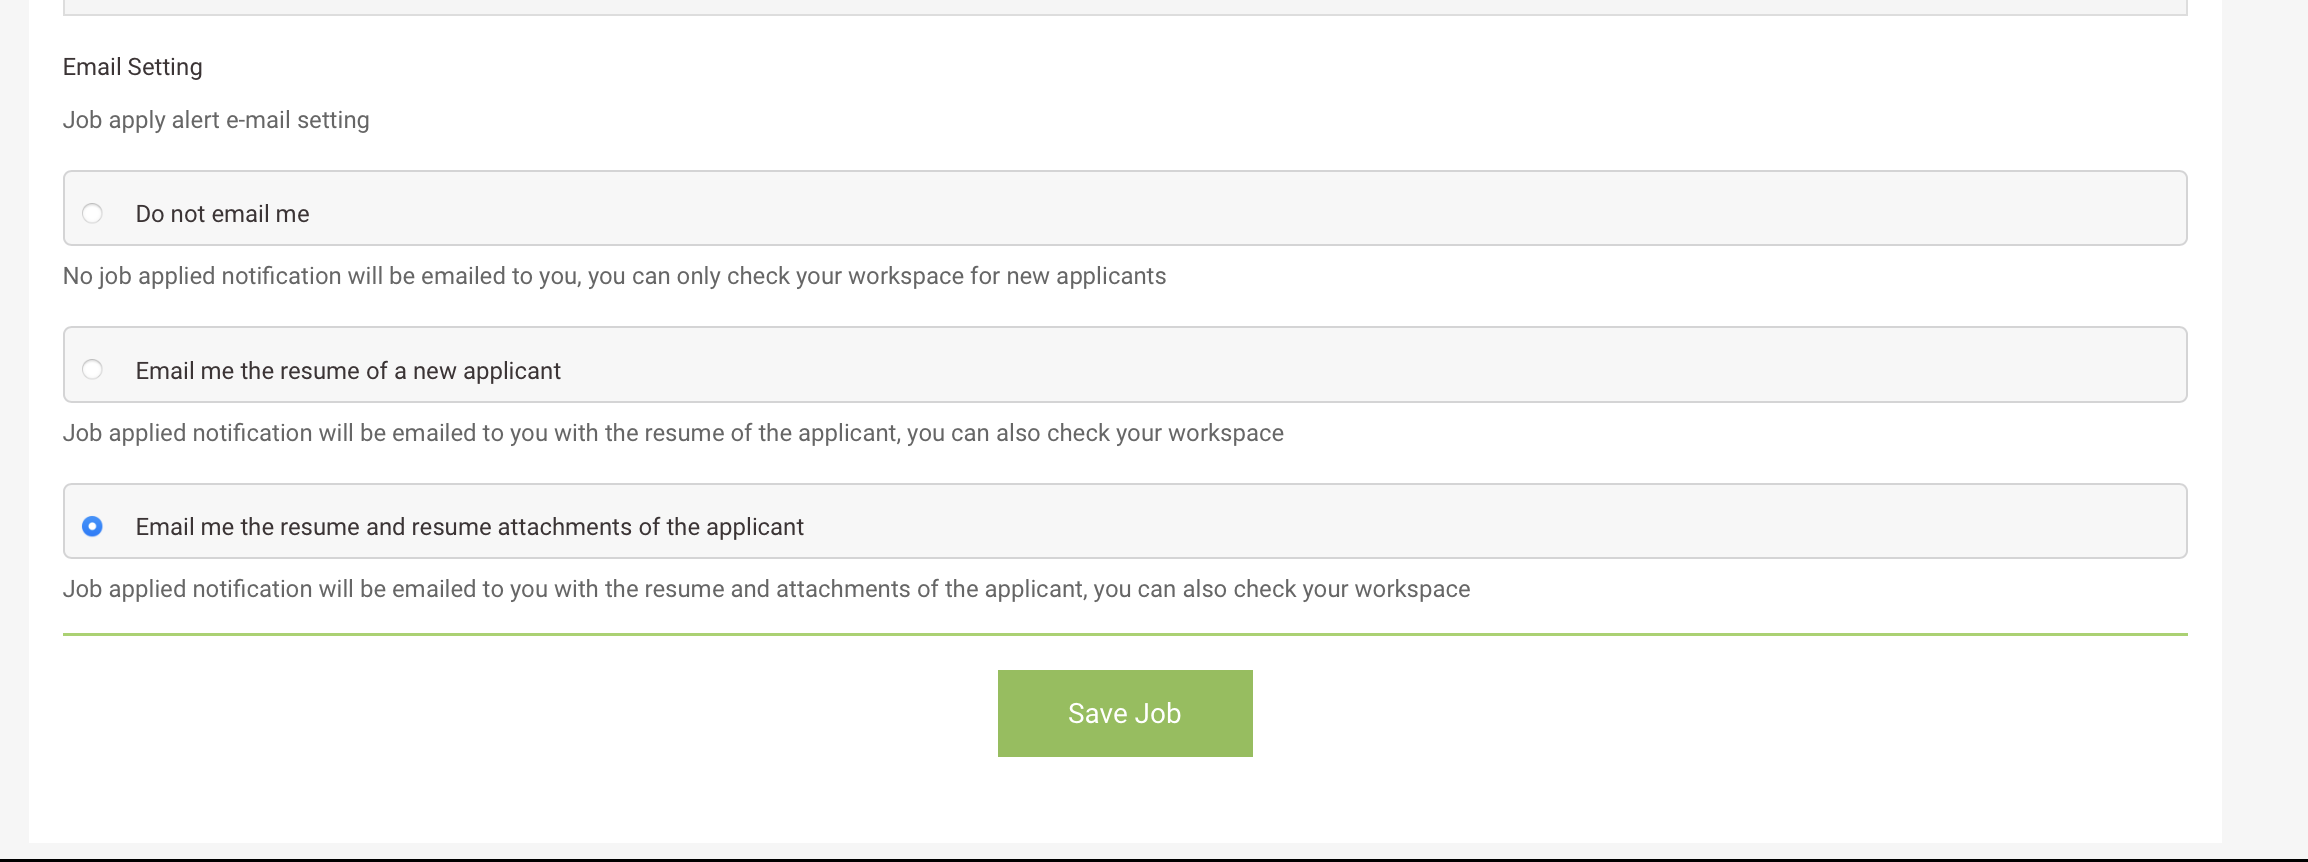
FINAL NOTIFICATION SELECTION. At the bottom, before clicking save, be sure to select the level of email notification you want when a job seeker applies to your position. We recommend the option which is chosen by default.
Click save when complete.
|
  |
|
Step 9. You're done! Depending on the dates you selected to publish the position, it may show up immediately in the job listings and is available to seekers right away.
It is also advisable to be in touch with your local area MFNO representative or our office to make them aware of the offering. Sometimes there are seekers who may not fully be in the system yet and we can encourage them to view and apply to the position.
|
|


